When you buy through links on our site, we may earn an affiliate commission at no additional cost to you.
Hello, bakers and my keen learners, this blog post is all things #HarryPotter!
Harry Potter was one of the first novels I ever read, thanks to my Dad. At a book sale, he randomly picked up the Philosophers Stone book and handed it over to me. I was probably 10 years old and have been in love with the series since then!
For me, Harry Potter has been a big part of my childhood. From waiting in queue to get the latest book from the bookstore to re-reading all the novels umpteen times, to watching the movies in theatres, I can easily say it has been one of my favourite fantasy series. Luckily for me, on my visit to London and Scotland last year, I got to see the Harry Potter and the Cursed Child Theatrical and visit multiple places in Edinburgh which supposedly inspired J.K. Rowling to write this amazing series.
If you haven’t read the books or seen the movies, please do! They also make for excellent gifts for kids and adults!


So, now you would understand my excitement when I get clients requesting Potter-inspired cakes. It takes me back to the magical world where I get nostalgic and ends up, with me watching the movies all over again (every single time, hahaha)!
Before we being, here are some more fondant-related tutorials you may like:
- Father’s Day Cake Topper – Easy Step by Step Guide on Creating Your Own
- Christmas Fondant Tutorial: Everything You Want To Learn – Pre-Order Now
- Fondant for Beginners
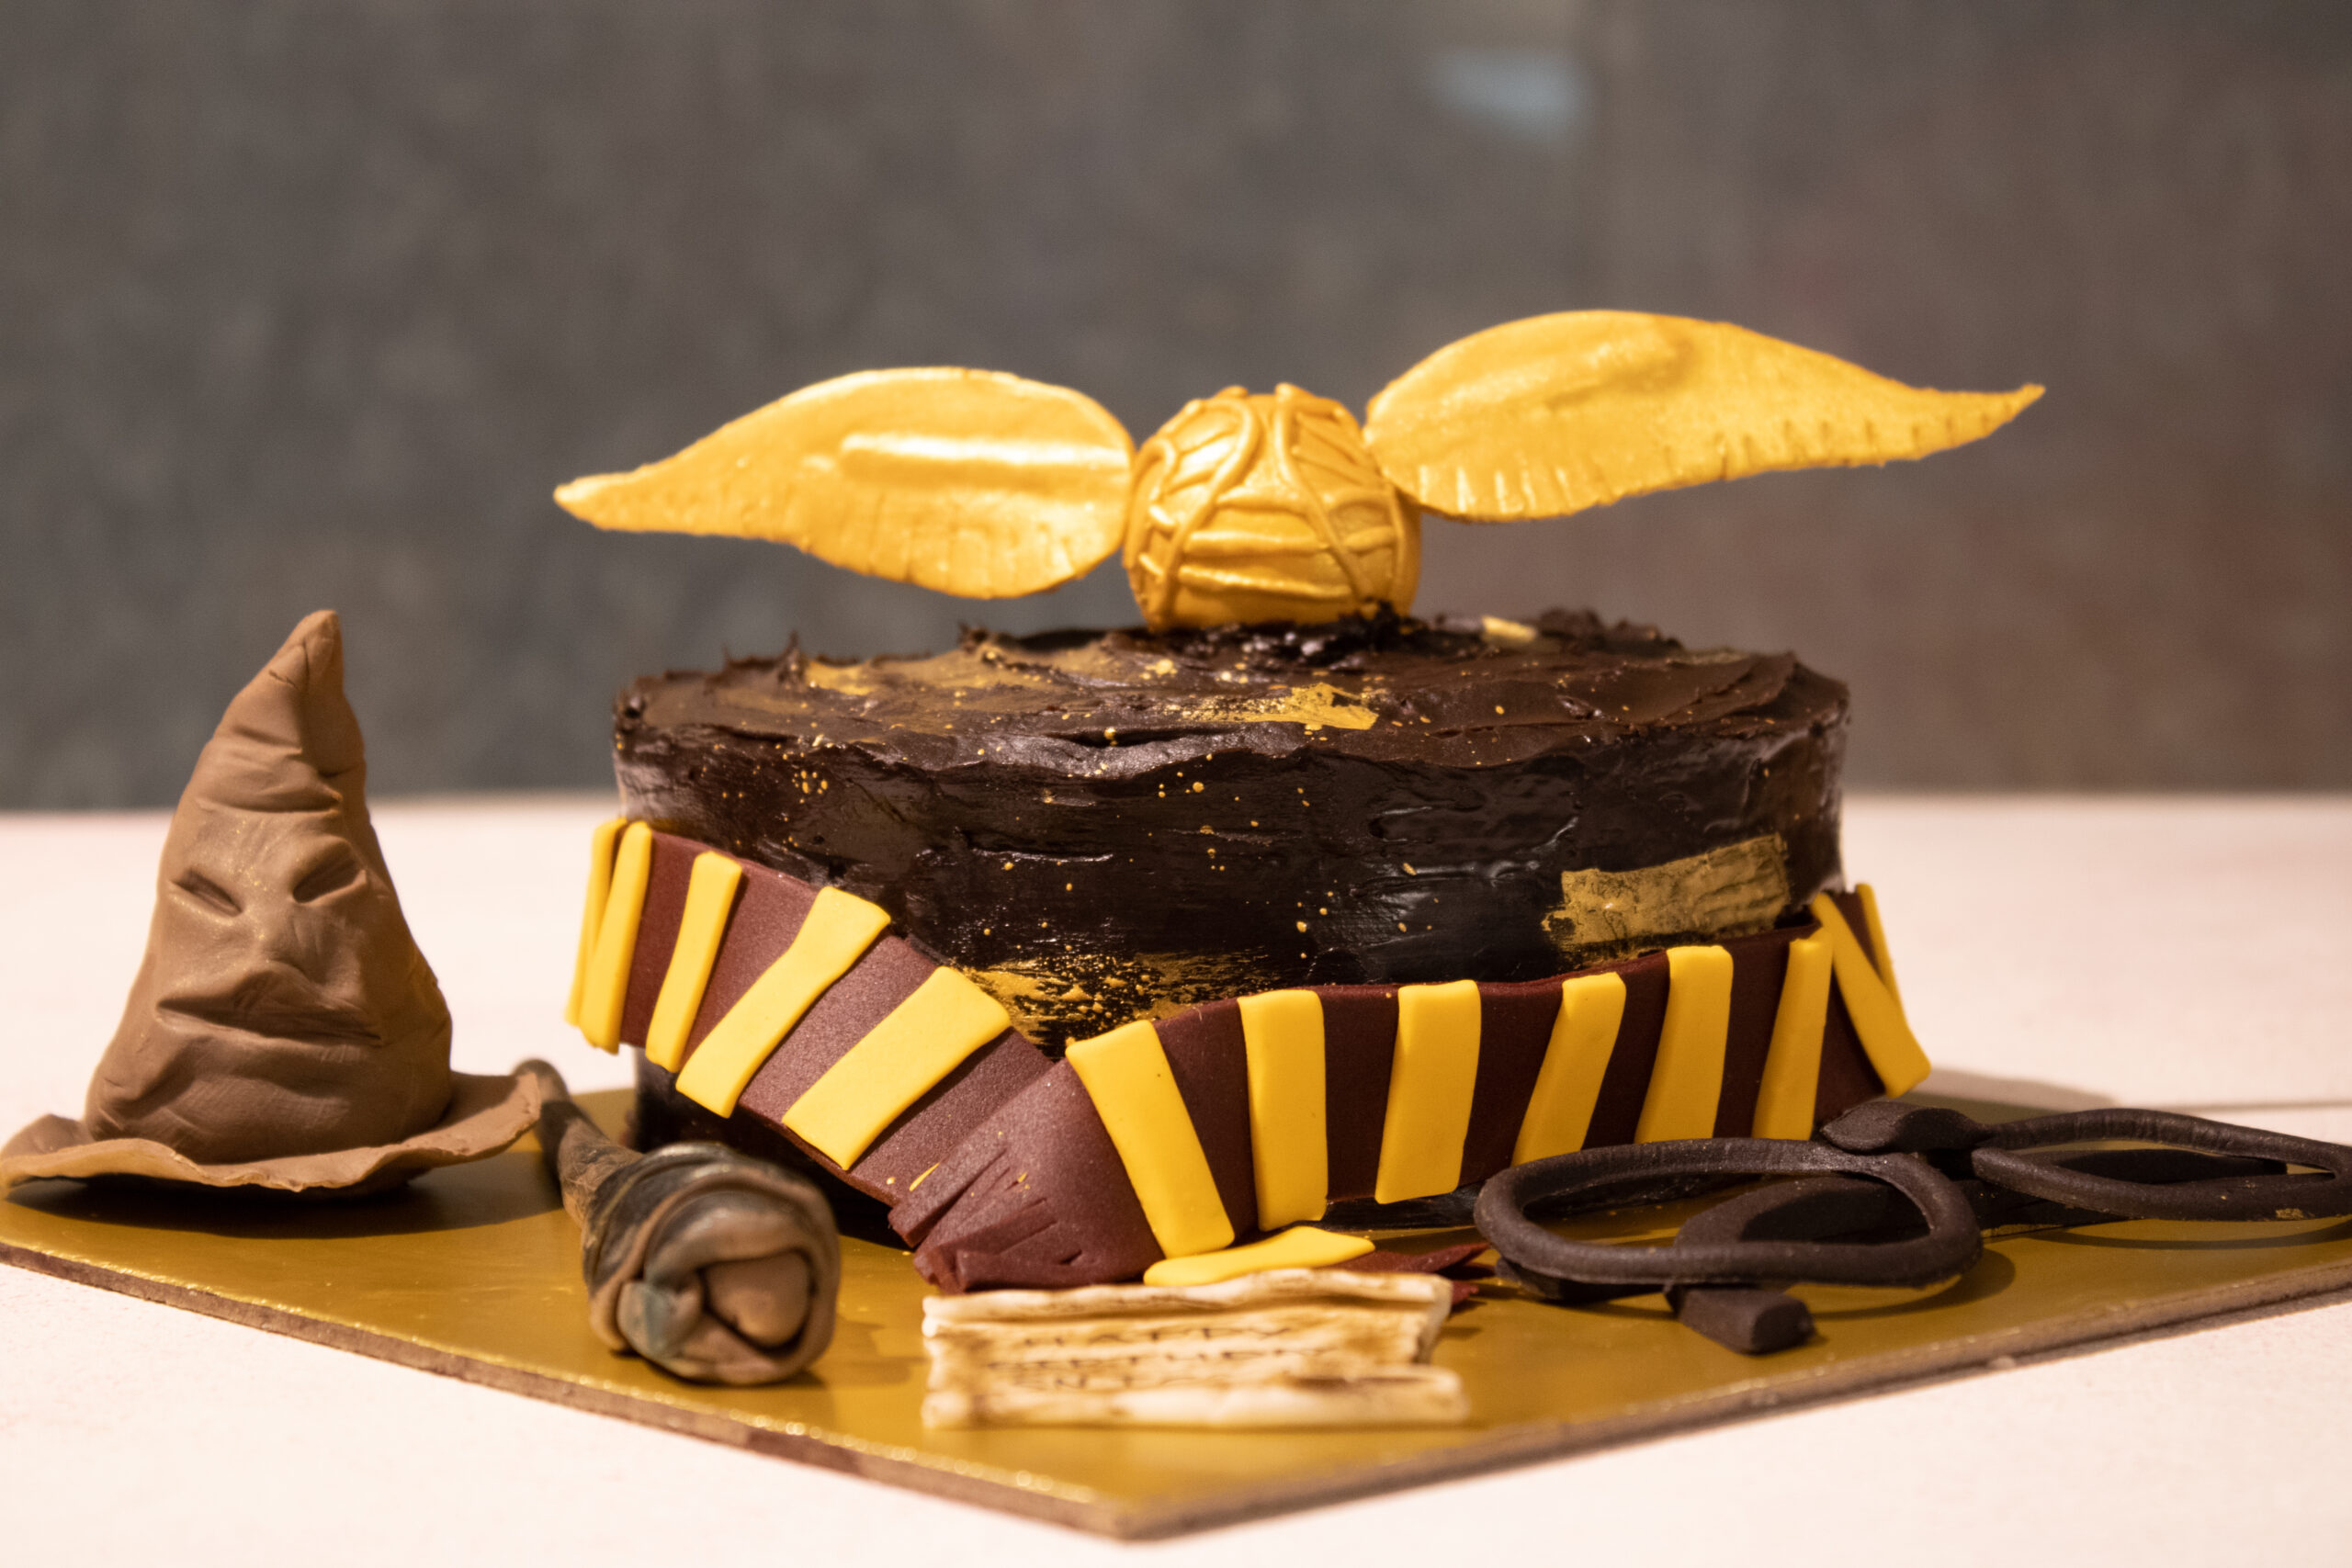
Now, getting to the important part of this blog post, I will take you through a step-by-step process on how to make:
- The Gryffindor Scarf
- The Sorting Hat
- Harry’s Glasses
- A Magical Wand, and;
- The Golden Snitch
Shall we begin then?!?
The Gryffindor Scarf

Things You Need:
- Maroon/Burgundy Fondant*
- Yellow/Golden Yellow Fondant*
- Rolling Pin
- Fondant Strip Cutter OR
- Pizza Cutter & Ruler
- Water
- Food Safe Paintbrush
- Exacto Knife
- Cake Dummy
*To make burgundy/maroon colour fondant, I had some red fondant to which I added a drop of crimson, 2-3 drops of blue and a drop of black food gel colour to achieve the desired colour.
For the golden yellow, I coloured some white fondant with golden yellow food gel colour. you can dye it yellow if you do not have the golden yellow gel colour.
Process:
- Roll out the maroon fondant into a long thin strip, 1mm thickness, to make the body of the scarf.


- Wrap the strip around the cake tin or anything of similar shape that you will bake in, to get an idea of how long the scarf should be, I have used a cake dummy here.

- Cut the strip using a ribbon cutter or with the help of a pizza cutter and ruler. The width of the scarf is up to you.


- Now roll out the yellow or golden yellow fondant as thin as possible and cut small strips.


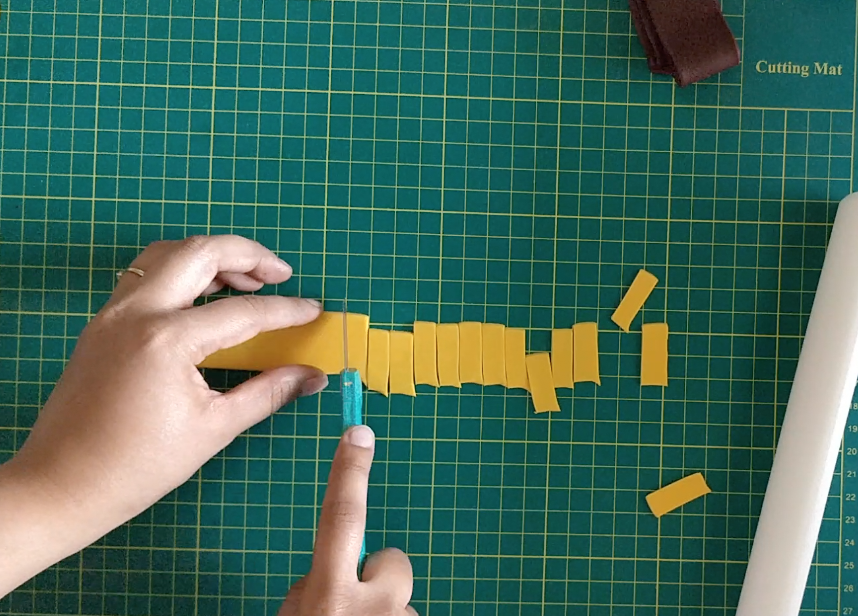
- Glue these strips of yellow fondant across the maroon scarf at an equal distance all along.


- Using a knife, cut the ends of the scarf to create fringes.
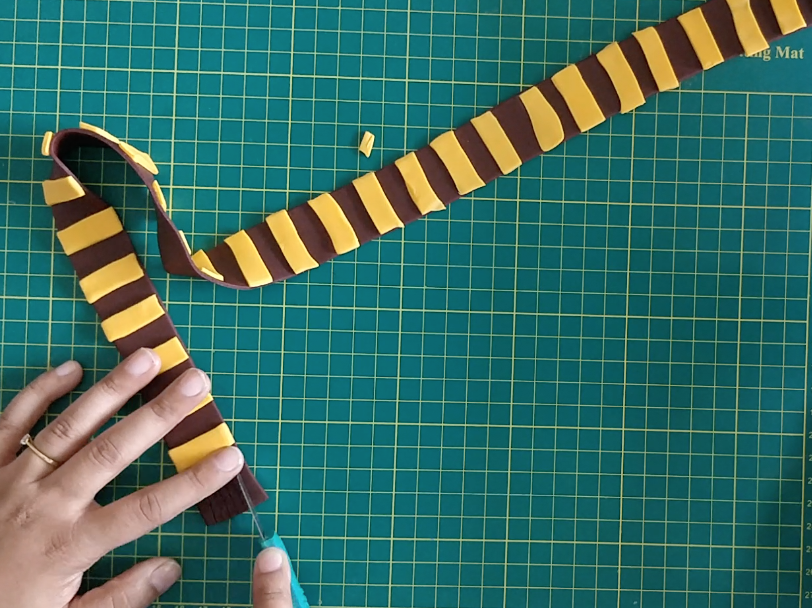
And there you have it, our Gryffindor Scarf. Using the same method, you can make a scarf for any of the other three houses.
Here is the video for the same too.

The Sorting Hat
Things You Need:
- Brown Fondant
- Dried out fondant (optional)
- Rolling Pin
- Circle Cutter
- Aluminium Foil
- Water
- Food Safe Paint Brush
- Fondant Sculpting Tool
Process:
- Take the brown fondant and roll it out.

- Taking the dried-out fondant (if using) or some aluminium foil, crunch it up to make a ball. Wrap the rolled-out brown fondant around the foil or dried-up fondant.

- Shape this into a rugged cone.

- Roll out another piece of brown fondant for the base of the hat and cut using a circle cutter.


- Dab a piece of scrunched-up aluminium foil over the base for some texture.


- Stick the base to the cone of the hat.

- Using the sculpting tool, make the face of the hat and also the other creases all around.

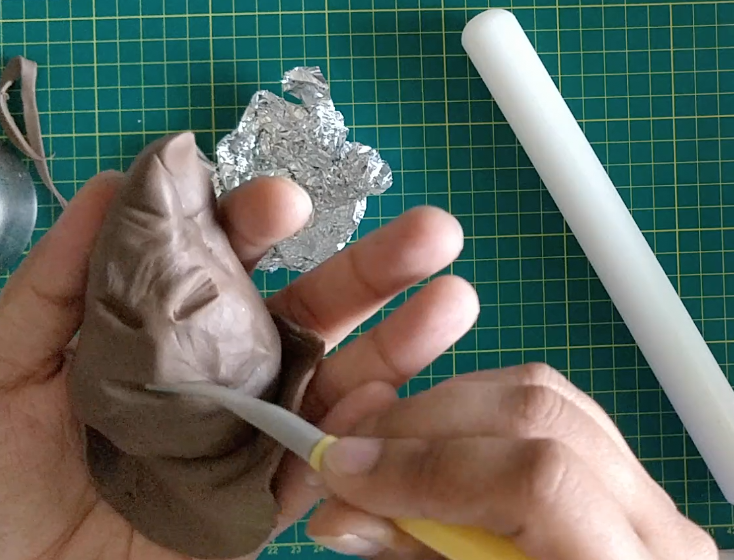
- Dry the hat over some crunched-up foil overnight so that the base is not flat.
Harry’s Glasses
Things You Need:
- Black Fondant
- Rolling Pin
- Circle Cutter in two sizes
- Plastic wrap
- Water
- Food Safe Paint Brush
- Fondant Sculpting Tool

Process:
- Roll out the black found to approximately 2 mm thick.

- Cover the fondant with the plastic wrap. On top of the wrap, place the bigger circle cutter and cut.


- Next using the smaller circle cutter, placed it inside the larger one, and cut again.


- Do this twice to create the rims of the glasses.


- Cut out a small rectangular piece to make the bridge of the glasses.

- Now to create the temples of the glasses, cut two long and thin rectangular pieces and bend them from one end into lopsided “J”s.

- Place the temples on top of each other like how glasses are when folded and then place the round rims and bridge on top. Using a bit of water stick the edges of the rims to the temples. If the temples are too long, cut them using a knife.


- Dry this overnight at an angle over a folded tissue for some elevation.
A Magical Wand
Things You Need:
- Brown Fondant*
- Food Safe Paint Brush
- Knife
- Black Food Gel (optional)
- Green Lustre Dust (optional)

*To make brown fondant, I coloured white fondant with a couple of drops of brown food gel colour.
Process:
- To make the wand, roll out the fondant into a long sausage, with one end thicker than the other. When you are happy with its shape, leave it aside.


- Roll out an amoeba shape fondant piece and wrap it around the base of the wand.


- Roll out a very thin sausage of fondant and wrap it around the base of the wand.


- Shade the wand with the lustre dust and black food gel using a paintbrush to make it look a bit weathered and old. Scratch the surface of the wand with the knife too. Leave it to dry overnight so that it stiffens up.


The Golden Snitch
Things You Need:
- White Fondant
- Yellow Fondant
- Golden Edible Lustre Dust
- Lemon Essence or Vodka
- Rolling Pin
- Lollipop Stick
- Toothpick
- Knife
- Water
- Food Safe Paint Brush
- Cake Dummy

Process:
- Take some yellow fondant and roll it into a golf ball size ball. This is going to be the body of the snitch.

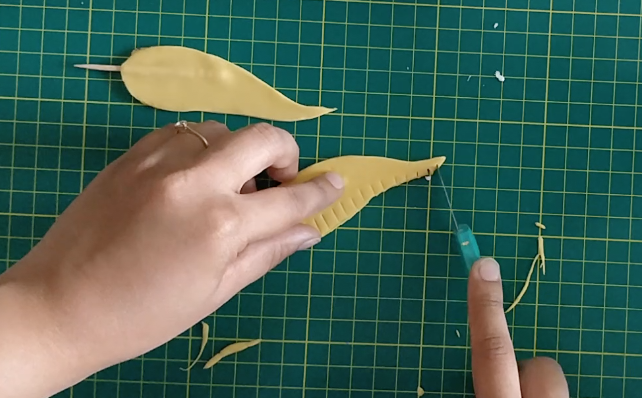
- Now to create the wings, roll out some fondant to 1mm thickness. Using a sharp knife, cut out the wing shape. Do this four times.


- Take one wing, paint a little bit of water on one side of the wing and gently press in a toothpick. Stick the other wing right on top of it. You are basically sandwiching a toothpick in between the two wings so that the wings can be attached to the body of the snitch. Make sure that a bit of the toothpick is sticking out.
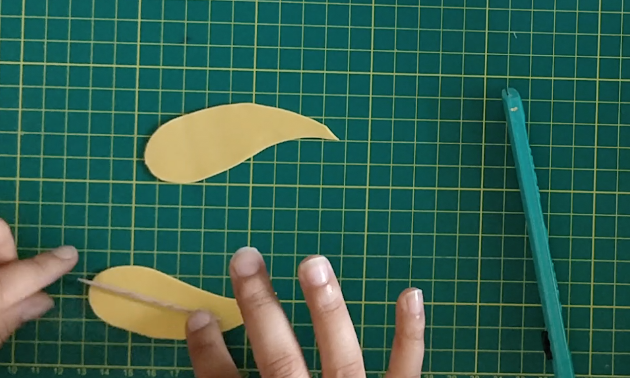

- Now, using a knife, make small snips all across the bottom of the wings.
- Put the body of the snitch on a lollipop stick. It will be easy to dry the snitch in this position.

- Make very thin ropes of the fondant by rolling the fondant between your hands or on the mat. Using a bit of water, stick the fondant ropes around the body of the snitch to give it a more realistic look. I used a google image as a reference point.


- To attach the wings, dip only the toothpick sticking out of the wings into some water and then insert it into the ball.


- Let it dry like this for a couple of hours before painting it golden.
- To paint the snitch golden, take a 1 tsp of the lustre dust and add 3-4 drops of lemon extract or vodka. Mix it well with a paintbrush. If it’s too thick, add the extract drop by drop to achieve a saucy consistency. Now paint away.

- And that is it! Your snitch is now ready. Leave this to dry overnight.
So this is it from my end. I hope this blog post helped you all. Please note, all these items can be made using gum paste as well. They will dry more quickly so you may need to work a little faster.
Parents can make this into an activity with kids as well using fondant or play-do (except the painting the snitch golden, I guess).
To make these for cupcakes as cupcake toppers, you can follow the same steps just make everything much smaller.

If you liked this tutorial, check out my latest course for pre-order:
Christmas Fondant Tutorial: Everything You Want To Learn
or you can buy it here:
Buy this Now!Do let me know if you try making these or how you found this blog post in the comments below. Also do not forget to share pictures. Tag me @ovenbytes on Instagram or Facebook. You can also subscribe to my Youtube channel.
Ending this blog post with one of my favourite quotes from the series “Differences of habit and language are nothing at all if our aims are identical and our hearts are open” – Harry Potter and the Goblet of Fire
Happy Creating,
Aanchal 🙂




[…] Harry Potter Fondant Decorations: Step by Step Easy Tutorial […]
[…] Harry Potter Fondant Decorations: Step by Step Easy Tutorial […]
[…] Harry Potter Fondant Decorations: Step by Step Easy Tutorial […]
[…] Harry Potter Fondant Decorations: Step by Step Easy Tutorial […]
[…] rybelsus pill […]
[…] buy clomid online […]